


If you’re on the lookout for fun baking ideas for kids, you’re in the right place. And as a bonus, you get the chance to teach your little ones some essential life skills without them even realizing it.
They get to practice measuring, follow instructions, and even learn a bit of patience, not to mention the importance of kitchen safety. These are life lessons that’ll stick with them long after the cookies are gone.
So spend quality time together, make a bit of a mess, and turn everyday ingredients into something special with these easy kids' baking recipes.
Kitchen Safety for Kids
Before you get to baking, it’s important to lay some ground rules on kitchen safety for kids to avoid any catastrophes.
Supervise Your Little Chefs
Kids have a way of turning even the simplest tasks into a bit of chaos, which is why supervision is non-negotiable. Whether they’re cracking eggs or pouring flour, staying close means you can step in before things go sideways. Plus, it gives you the chance to teach them little tricks and tips as they go along.
Handle Hot and Sharp Objects Yourself
Anything to do with ovens, stovetops, and knives, keep these tasks to the adults or older children who understand the risks while teaching them to respect the heat and the sharpness of these apparatus.
Involve younger children by using plastic or child-safe knives without worry. Always transfer trays in and out of the oven yourself, and make sure kids understand the importance of letting treats cool down before touching them.
Clean as You Go
As satisfying as it is to make a mess in the kitchen, cleaning as you go will save you work for later and, more importantly, keep everyone safe from avoidable accidents. Small habits like washing hands frequently, wiping up spills straight away, and keeping workspaces clean and organized can make a big difference.
Use The Right Tools
Using the correct tools can make baking safer and easier. Invest in kid-friendly utensils, like silicone spatulas, mixing bowls with grips, and oven mitts that fit their hands. This will help them feel more confident and safe as they get stuck into making their sweet treats.
Set Boundaries
Make sure your kids know where the ‘no-go’ zones are in the kitchen. These are any areas where hot pans, sharp tools, or delicate tasks happen. Instead, create a safe zone where they can still be part of the action without being too close to any potential dangers.
Essential Baking Tools and Ingredients
To make sure your baking adventure runs smoothly, it’s important to have the right tools and ingredients on hand. You don’t need anything fancy–most of these are probably already in your cupboards and drawers.
Gather the Essentials
Getting the kids to gather all the essentials will keep them engaged while also teaching them how to organize and prepare—skills that will come in handy beyond the kitchen.
Baking Tools:
- Mixing Bowls: You’ll want a few different sizes. Plastic or metal bowls are ideal as they’re sturdy and less likely to break if they get dropped.
- Measuring Cups and Spoons: Get your kids practicing their math skills by letting them be in charge of measuring out ingredients.
- Whisk and Spatula: These are go-to tools for mixing and folding. Silicone spatulas are particularly great as they’re flexible and easy to handle.
- Baking Sheets and Pans: A non-stick baking sheet for cookies, a muffin tin for cupcakes, and a loaf pan for banana bread or other simple breads will do the trick.
- Rolling Pin: Look for a smaller, lightweight version that’s easy to manage when rolling dough.
- Cookie Cutters: Let the kids choose shapes and cut out their own designs from the dough.
- Oven Mitts: Make sure to have kid-sized oven mitts on hand for when it’s time to take your baked goods out of the oven.
Baking Ingredients
- Flour: All-purpose flour is the staple of most baking recipes. Keep stocked up because you’ll use it in almost everything.
- Sugar: You’ll need both white granulated sugar and brown sugar. It’s also a good opportunity to teach kids about the differences between the two.
- Baking Powder and Baking Soda: These raising agents make your baked goods turn out light and fluffy. Turn it into a science lesson by explaining how these ingredients work.
- Butter: Whether it’s salted or unsalted, butter adds flavor and texture. Let your little ones practice cutting it into pieces and watching it melt into the mix.
- Eggs: Eggs are the glue that hold your baked goods together. Give the mini bakers a chance to practice cracking them so they get the hang of it.
- Milk or Buttermilk: These add moisture and richness to your dish, while buttermilk also brings a slight tang that’s ideal for certain treats.
- Vanilla Extract: A little vanilla goes a long way in boosting the flavor of your baked goods. Remember, less is more when getting kids to measure it out.
- Salt: A pinch of salt enhances the taste and balances out the sweetness in your baking.
Tip: Once you’ve got everything together, why not turn it into a fun scavenger hunt? Give them a list and have them find each item in the pantry or fridge. You could also set them challenges like measuring out the flour without spilling it. These small tasks will make them feel like an important part of the process and build their confidence in the kitchen.
Easy Baking Recipes for Kids
These are some easy baking ideas for kids, great for little hands and growing imaginations.
Cookies
Nothing says "fun baking ideas for kids" quite like making cookies together. With minimal ingredients and simple steps, they’re easy for little hands to get involved.
Classic Sugar Cookies
Classic sugar cookies are perfect for getting creative, and they’re so simple to whip up with just a handful of ingredients.
- Making the Dough: Start by mixing butter and sugar until it’s light and fluffy. Then, add in the eggs and vanilla. Finally, mix in the flour and a pinch of salt until everything is well combined. Kids can help with measuring and pouring everything.
- Chilling the Dough: Once your dough is mixed, chill it in the refrigerator for about an hour. This step makes it easier to handle while also helping the cookies keep their shape when baking.
- Rolling and Cutting: Roll out the dough on a floured surface to about ¼ inch thickness. Then let them go wild with cookie cutters. Use various designs such as stars, hearts, animals, or whatever they fancy.
- Baking: Place the cookies on a baking sheet and into the oven they go. Just 8-10 minutes at 350°F (175°C) and they’ll be ready to decorate. But let them cool completely first.
- Decorating: Set up a decorating station with icing, sprinkles, and edible glitter and let the kids go to town with their designs.
Tip: Sugar cookies make awesome holiday gifts or decorations too! Stack them in a mason jar, tie them with a ribbon, or even turn them into edible ornaments for your Christmas tree.
Chocolate Chip Cookies
Chocolate chip cookies are the ultimate comfort food and are so easy to make that even the youngest bakers can help out.
- Mixing the Dough: Start by creaming together butter and brown and white sugars until fluffy (brown sugar adds a lovely chewy texture). Then, add in eggs and vanilla extract. Mix in the flour, baking soda, and a pinch of salt until just combined. Finally, fold in those chocolate chips.
- Scooping the Dough: Let the kids scoop the dough onto a baking sheet using an ice cream scoop or a tablespoon. This helps the cookies bake evenly.
- Baking: Pop the cookies in the oven at 350°F (175°C) for about 10-12 minutes, or until the edges are golden but the centers are still soft—this gives you that indulgent gooey middle. Let them cool for a few minutes before transferring them to a wire rack.
- Variations: You can add walnuts or pecans, mix in white chocolate or dark chocolate chips, or even sprinkle a little sea salt on top for an extra flavor boost. Let the kids experiment to make the cookies their own.
Tip: If you’ve got leftover dough, you can freeze it for later! Scoop it into balls, place them on a baking sheet to freeze until solid, and then transfer them to a freezer bag. You can also pop the baked cookies in the freezer in an airtight container, and they’ll stay fresh for months.
Cakes and Muffins
When it comes to easy baking ideas for kids, cakes and muffins are the ultimate crowd-pleasers. And these two recipes are sure to become family favorites.
French Yogurt Cake
The beauty of the French Yogurt Cake is that it’s nearly impossible to get wrong. In France, it’s often the very first cake that kids learn to bake. Here’s how to do it yourself:
- The No-Measure Magic: The secret to this cake’s simplicity is that you use the yogurt cup to measure all the ingredients. One cup of yogurt, two cups of sugar, three cups of flour—you get the idea.
- Mix It Up: Once the ingredients are measured, the kids can take the lead in cracking the eggs, pouring in the sugar, and stirring everything together. The batter comes together super quick, so it’s a great recipe for young bakers who are just getting started.
- Customize Your Cake: Encourage the kids to get creative by adding in their favorite fruits—think blueberries, strawberries, diced apples, or even a handful of chocolate chips.
Banana Bread Muffins
Banana bread is another classic comfort food, but turning it into muffins makes it even more kid-friendly.
- Mash Those Bananas: The first step is getting the little bakers to mash up some overripe bananas with a fork or even their hands. The riper the bananas, the sweeter the muffins, so don’t be shy about using those spotty ones sitting on your counter.
- Stirring and Scooping: Now it’s time to mix in the other ingredients—sugar, eggs, flour, baking soda, and a pinch of salt. Let them stir it all together and then scoop the batter into muffin tins.
- Mini-Muffin Fun: Use a mini-muffin tin and reduce the baking time slightly. You can even top them with a dollop of cream cheese frosting or a sprinkle of cinnamon sugar for that extra flair.
Tip: Make a double batch and freeze the extras for quick breakfasts or snacks. Just pop them in the microwave for a few seconds to enjoy them warm, like they’re fresh out of the oven.
No-Bake Treats
No-bake treats are for days when you want to keep things simple but still enjoy something delicious. Craving something rich and chocolatey or light and refreshing? Have a go at these fuss-free ideas:
No-Bake Chocolate Peanut Butter Bars
These bars combine the unbeatable duo of chocolate and peanut butter and, best of all, don’t require an oven.
- Mix and Press: Begin by mixing melted butter, graham cracker crumbs, powdered sugar, and peanut butter until everything is smooth and well combined. Once the mixture is ready, press it firmly into a baking dish, making sure it’s packed tightly so the bars hold their shape.
- Top With Chocolate: Next, melt some chocolate chips with a bit of peanut butter to keep it nice and smooth. Your little helpers can spread the melted chocolate over the base for a deliciously rich topping.
- Chill and Slice: Now, pop the dish into the fridge for about an hour to let it firm up. Once set, slice it into bars and enjoy.
Tip: If you want to mix things up, try using different types of nut butter—like almond or cashew—or even a nut-free option like sunflower seed butter. You can also toss in some dried fruits like raisins or cranberries for an added burst of sweetness and texture.
Fruit and Yogurt Parfaits
Perfect for breakfast, a snack, or even dessert, fruit and yogurt parfaits are incredibly easy for kids to put together, not to mention a great way to sneak some extra fruits into their diets.
- Layer It Up: Start by setting out bowls of yogurt, fresh fruit, and granola. The little ones can take charge of layering the ingredients in clear cups or glasses, starting with yogurt and followed by a handful of berries, bananas, mangoes, you name it. Then, sprinkle on some crunchy granola. Repeat the layers until the cup is full.
- Get Creative: You can even drizzle a bit of honey, add a sprig of mint, or even sprinkle cinnamon between the layers. It’s a fantastic way to let kids express their creativity.
Things to Bake on a Rainy Day
When the weather outside is frightful, it’s the perfect excuse to gather the kids, roll up your sleeves, and fill your kitchen with the cozy aroma of freshly baked treats. These heartwarming things to bake on a rainy day are sure to brighten up the mood:
Cinnamon Rolls
They’re soft, gooey, and great for a warm breakfast or afternoon snack on a gray day.
- Make the Dough: Start by mixing warm milk, sugar, melted butter, eggs, and yeast in a large bowl. Gradually add flour until a dough forms, then knead until smooth. Cover the dough and let it rise until doubled in size.
- Roll and Fill: Once the dough has risen, roll it out into a large rectangle. Spread a generous amount of softened butter over the dough, then sprinkle on a mixture of cinnamon and sugar. Roll up the dough into a tight log. It’s a fun challenge for little hands—just remind them to be gentle!
- Slice and Bake: Slice the dough into rolls and place them in a baking dish. After a second rise, bake the rolls until they’re golden and your kitchen smells amazing. Drizzle with an icing made of powdered sugar and milk, and enjoy the warm, gooey goodness.
Soft Pretzels
The bitterness of a rainy day just got a whole lot sweeter with a batch of soft pretzels.
- Make the Dough: Combine warm water, sugar, and yeast in a bowl and let it sit until foamy. Stir in flour and salt to form a dough, then knead until smooth. Let the dough rise in a warm spot until it doubles in size.
- Shape the Pretzels: Cut the dough into equal portions and let the kids roll each piece into a long rope. Show them how to twist it into a classic pretzel shape. You could also try making pretzel bites or sticks instead.
- Boil and Bake: For that perfect texture, boil each pretzel in a pot of water mixed with baking soda for about 30 seconds before placing them on a baking sheet. Brush with egg wash and sprinkle with coarse salt before baking until golden brown. Serve warm with your favorite dipping sauce.
Warm Fruit Crisps
These are sweet, satisfying and simple enough for kids to make almost entirely on their own.
- Prepare the Fruit: Let the mini bakers help you peel, core, and slice your choice of fruit—apples, berries, or peaches all work wonderfully. Toss the fruit with sugar, a little flour or cornstarch, and some cinnamon, then spread it out in a baking dish.
- Make the Topping: In a separate bowl, mix together oats, flour, brown sugar, and a pinch of salt. Cut in cold butter until the mixture is crumbly. Sprinkle the topping evenly over the fruit.
- Assemble and Bake: Spread the fruit evenly in a baking dish, then sprinkle the crumble topping over it. Bake at 350°F (175°C) until the fruit is bubbly and the topping is golden brown.
- Serve with Ice Cream: Serve with a scoop of vanilla ice cream or a dollop of whipped cream for a comforting treat.
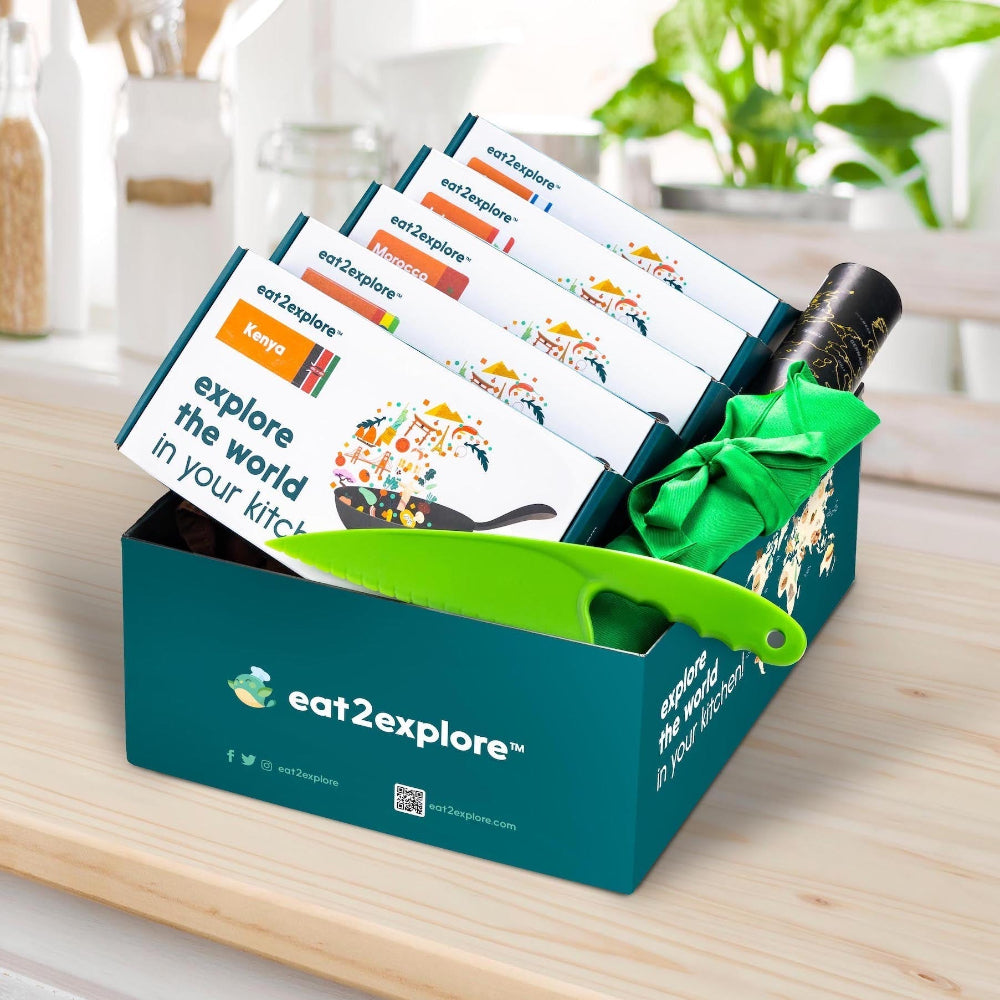
Explore with Baking Kits for Kids
If you’re looking to make baking with your kids even more engaging, educational, and hassle-free, eat2explore’s baking kits are a no-brainer. Designed with young bakers in mind, they simplify the process by providing everything you need to get started. Each kit comes with pre-measured ingredients, easy-to-follow instructions, and cultural tidbits about the origins of the recipes.
It’s a wonderful way to expand your child’s palate and spark their curiosity about different cultures. Introduce them to international cuisines and baking traditions from countries like France, Italy, and Japan, all while creating something delicious together.
Whether you’re looking to bond with your little one over a new activity or simply want to make baking easier and more exciting, eat2explore’s baking kits for kids are just what you need. Explore our range and start your culinary adventure today.
Make Baking a Fun Family Tradition
There’s something special about baking together as a family. By making it a regular activity, you’re teaching your kids valuable skills while also building a tradition that everyone will look forward to.
Whether you’re whipping up a fresh batch of cookies or exploring new recipes from around the world, don’t forget to use eat2explore’s baking kits. We’ve got plenty of fun baking ideas for kids to keep them busy on rainy afternoons and beyond.
FAQ
What to bake when bored for kids?
When boredom strikes, there are plenty of things to bake to keep kids entertained. You can try making sugar cookies decorated with colorful icing, mini pizzas with their favorite toppings, or even creating easy no-bake treats like chocolate peanut butter bars. eat2explore’s baking kits offer exciting global recipes that turn kitchen time into a fun-filled adventure.
What to bake with a 3-year-old?
When baking with a 3-year-old, the key is to keep things simple and fun. Opt for easy recipes like soft sugar cookies that they can help cut out or no-bake treats like rice crispy squares where they can stir and press the mixture into the pan. eat2explore’s baking kits turn baking into a hands-on learning experience with global recipes designed for little chefs.
What are fun things to bake?
For ideas on fun things to bake, think of whipping up colorful rainbow cupcakes, shaping soft pretzels into fun designs, or baking a gooey chocolate lava cake. If you’re looking to add a twist to your baking routine, try one of eat2explore’s baking kits for a journey around the world with easy-to-follow recipes inspired by global flavors!
When to start baking with toddlers?
You can start baking with toddlers as soon as they’re interested in joining you in the kitchen, which is usually around 2 to 3 years old. At this age, they can help with simple tasks like stirring, sprinkling toppings, or pressing cookie cutters into dough. Remember to keep the activities easy and enjoyable.